Once again just like my
Clear Lights Tutorial, I've noticed that a lot of choppers have been darkening there windows and just leaving it at that for a tint job. In reality when a portion of glass becomes darker, the reflections becomes deeper and more visible. I decided to put together another short tutorial to show how to make more realistic tinted windows.
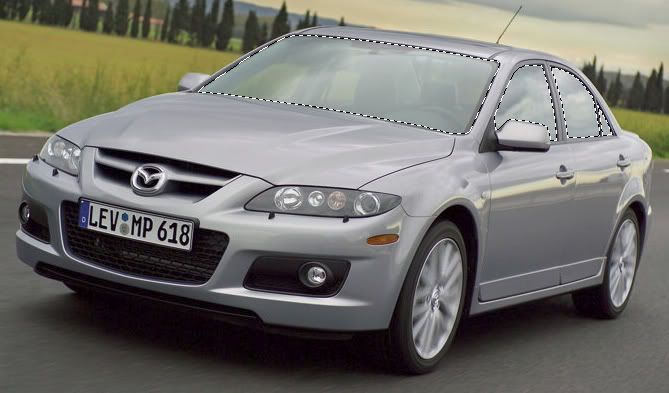
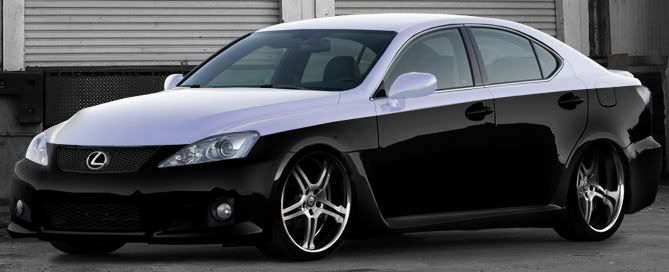
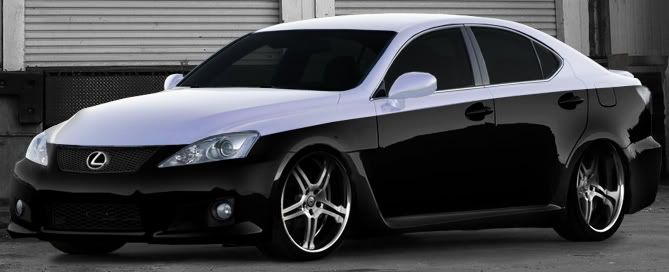
1)For this tut, I have chosen the european Mazda 6 MPS for my base.

2)First step is to grab the the Polygonal Lasso Tool (L)

and make a selection of the windows. Ensure that you
only select the windows, don't get lazy and select over the pillars or window wipers lol.
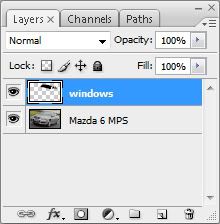
3)With your windows now selected, make a new layer from the layers menu. With the selection still selected, grab the paint bucket tool (G)

and fill the selection on your new layer completely black. You can deselct the new layer once it is filled (Ctrl + D). Name this new layer "windows" to avoid future confusion.

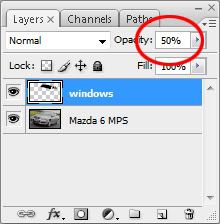
4)Now, on your "windows" layer, decrease the Opacity to about 50%. This is only a basic guideline, in some cases you may have to decrease it to 35%
depending on the lighting sources on the original photo. Of cource, you always have to play around with it and I am just including the settings I used for the tutorial.

5)Think your done now? Well guess what your not, the fun stuff comes now

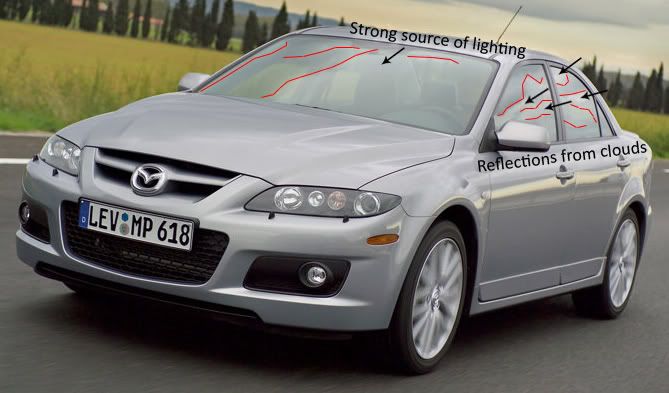
. Turn off your windows layer by pressing the "eye" icon that's next to the layer title in the layers menu and take a closer look at your original windows. Notice the reflections and highlights. Your next step is to create your own reflections ontop of your chopped windows layer. You don't have to add these stress lines in but they will help. I only included them to be more specific on what I'm trying to explain.
6)Now, create another new layer
on top of your windows layer and name it "reflections". You will now add your own reflections. In this case, the only main reflections are coming from the sky and clouds which can be easily brushed in. On more difficult photos with advanced scenary you would have to take selections from buildings and other surrounding objects to reflect in the windows.
You can now turn on your windows layer, but working in the reflections layer grab the Brush Tool (B)

and select a soft round brush at a medium size. I used a 65 pixel diamater for this photo. Lower the opacity of the brush to about 10% and select white for the color. Taking your time and making even strokes begin adding a light layer of white on top of your windows where the original reflections were. You can adjust the brush to make it smaller for more difficult areas. You can also deselect sections of the windows to add a gradient like light coming from only 1 direction.
With some time and patience here is what I came up with:

It should look a lot better then just simply making the windows darker. Compare this example to the one without the highlights and you notice a huge difference. I hope this helped
.


 Linear Mode


