Navigation:   Home  >>  Forums

Go Back   Photoshopchop.com > HOW TO'S > TUTORIALS

Notices

TUTORIALS The best place around to find some good tips and tricks from the members of PSC.

Reply
 
Thread Tools Display Modes
Old 05-31-2009, 10:06 PM   #1
boroboyben
PSC SENIOR MEMBER
 
boroboyben's Avatar
 
Join Date: Feb 2009
Location: Peterborough England.
Posts: 356
boroboyben is on a distinguished road
Default Easy Vent Tutorial

Right to help my younger brother aswell as those who cannot brush vents on here i made a vent tutorial which takes me 5 minutes to make a vent using. I made it completely by myself. If you do require help contact me via PM or email address supplied at the bottom of the thread.


How to make vents the VERY easy way.

Firstly open up your image that you wish to add a vent to, make sure there is enough room for a went to be added on the bodywork.
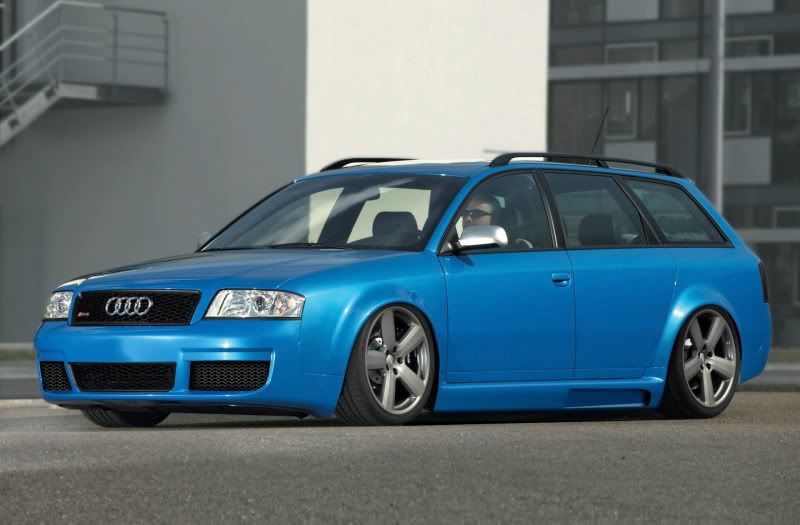
I'll be using an Audi RS6 AVANT, and i will make a quick side skirt to house the vent.


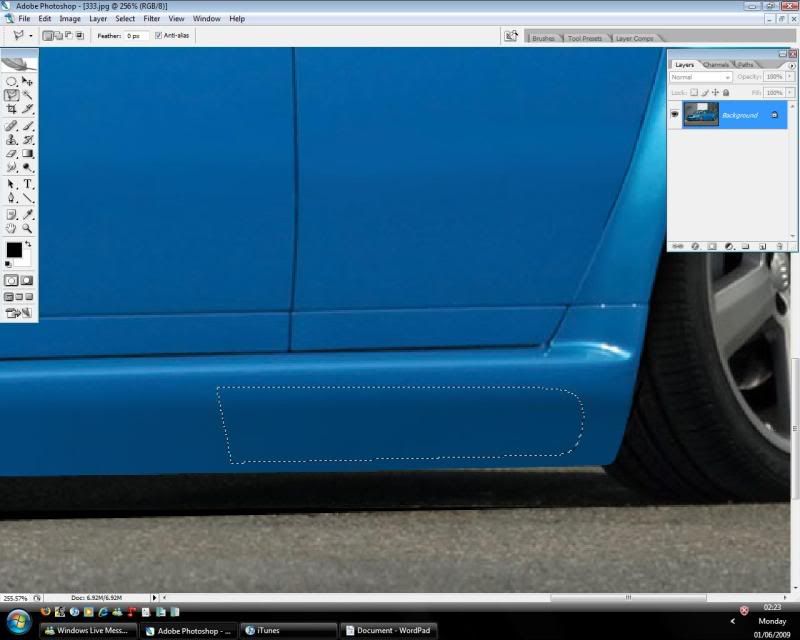
Right i've made the side skirt now its time to start making the vent, you can do whatever shape you wish, i like using a basic rectangle shape with a slight curve.
Firstly create your shape using the Polygonal lasso tool.


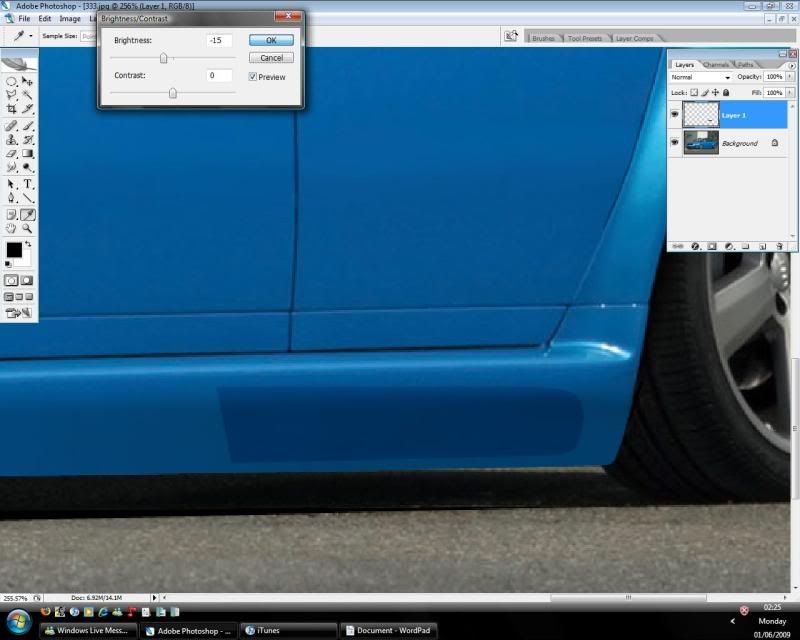
then copy and paste the layer then go to 'Image' >> 'Adjustments' >> 'Brightness/Contrast' and change the brightness to -15% then click ok


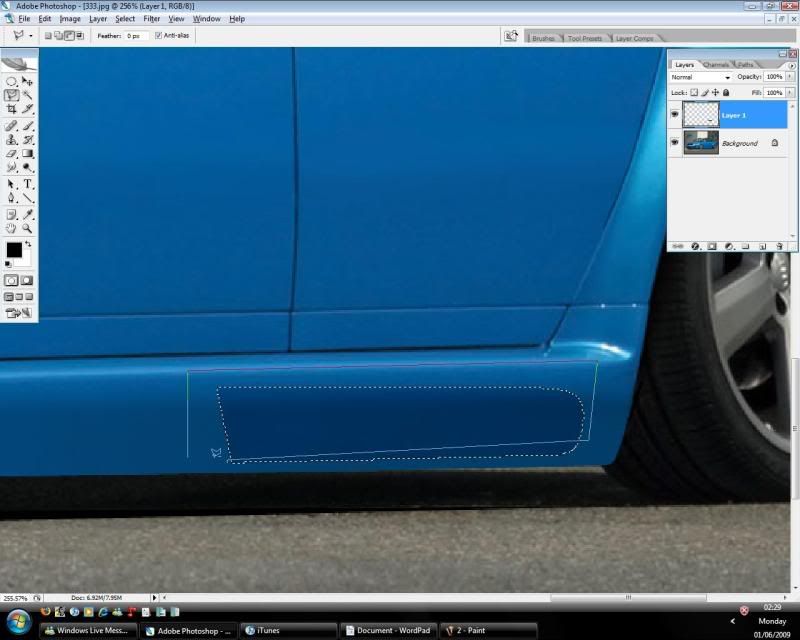
Now that is done select the layer (Ctrl + click on the layer until it forms that shape of your vent.) then we will start adding the highlights etc. Using the Polygonal lasso tool go round the bottom of the vent to form this shape, you will need it to be this or a very similar shape to this so it foms the highlight.


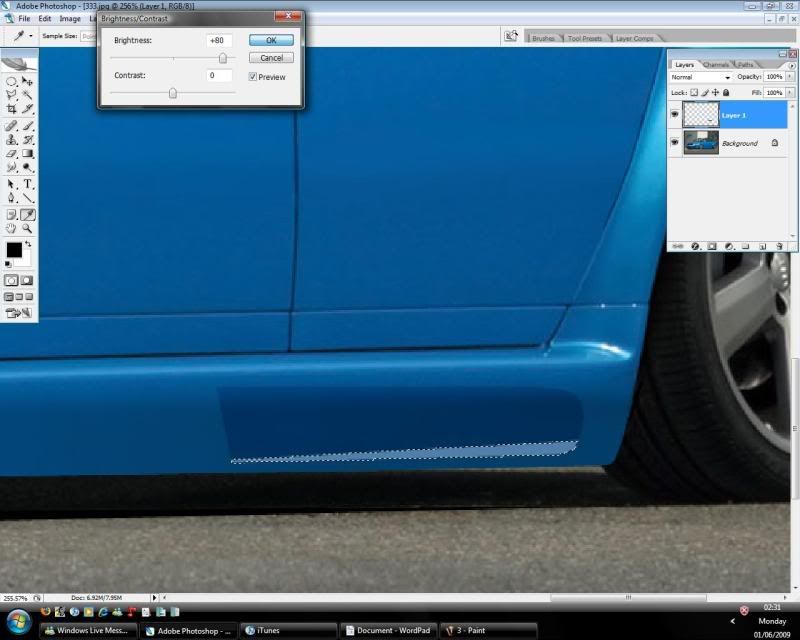
Once you've got the selection go to 'Image' >> 'Adjustments' >> Brightness/Contrast and change the brightness to +80% and click ok.


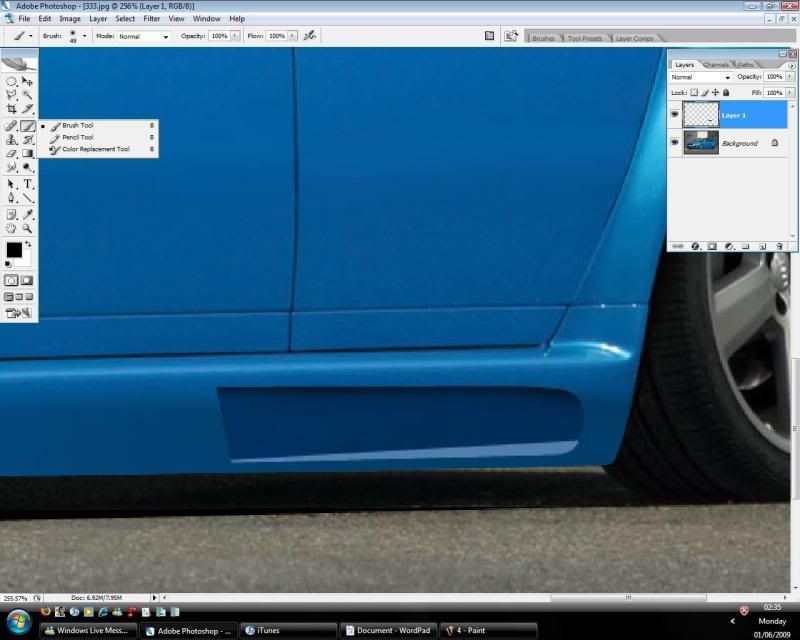
Right now we've got the highlight done its time to do the top shadow to give the vent some depth. For this press Ctrl and click on the layer to select it. Once you've done this get the paint brush tool and set it to 49px with the colour pallette being black and slowly brush a shadow on, try and make it neat as possible to get a decent effect. once this is done unselect it.


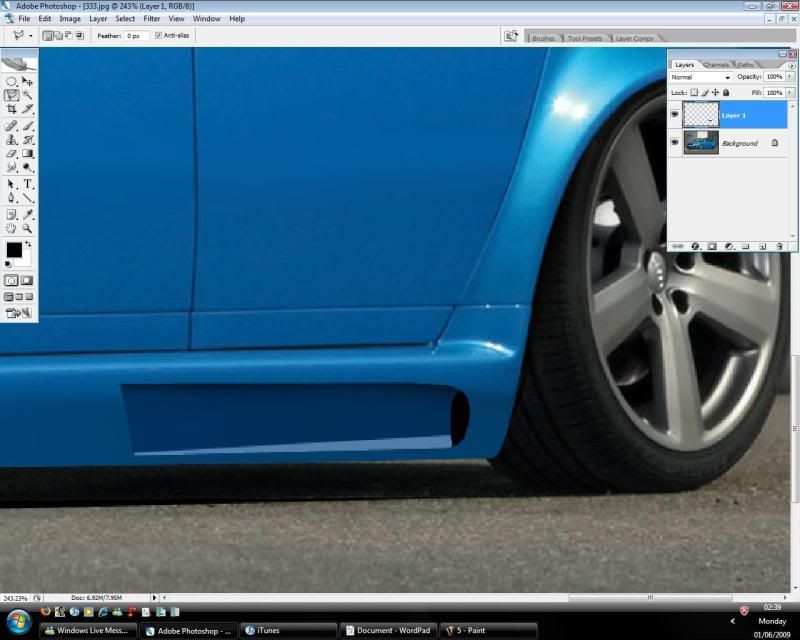
Right, now that is done we can start adding the rest of the vent again using Ctrl and clicking on the vent layer to select it make a vent shape (The hole in which would make up the actual vent.) then once you've got your desired shape paint it black and check that it is looking correct.


We now have most the vent built up so its time to add the finishing touches and to make it complete. Start off by selecting the layer (Ctrl+Clicking on the layer) then getting the black brush and just adding some shadows into the vent. Although you wont get the same effect as mine, use multiple layers to create a realistic looking shadow.


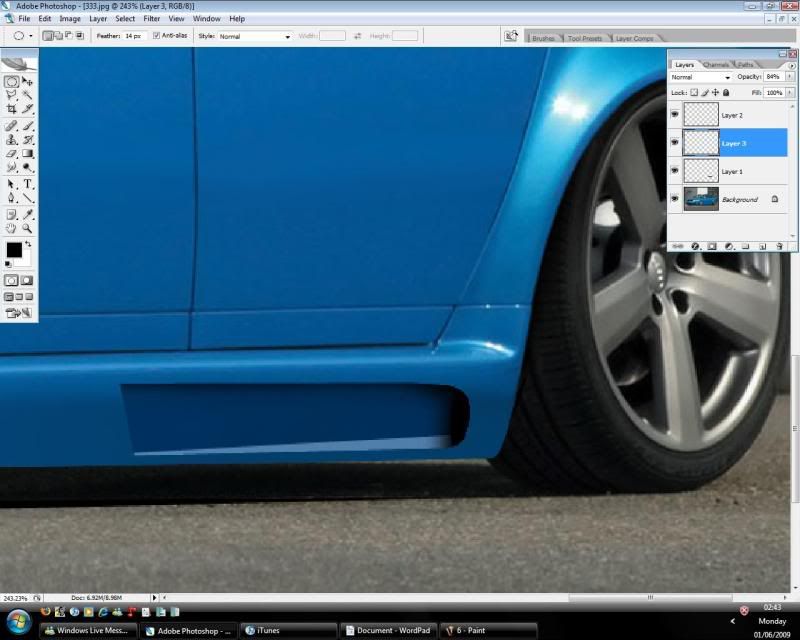
The vent is just about complete, at the left side it has a straight edge which looks very unsightly so we'll grab the eraser and erase it to match the bodywork.
Once you've erased it into the bodywork neaten out the sharp lines using the eraser. Heres what it looks like at 100% Then make sure you flatten your image by going to 'Layers' >> 'Flatten Image'


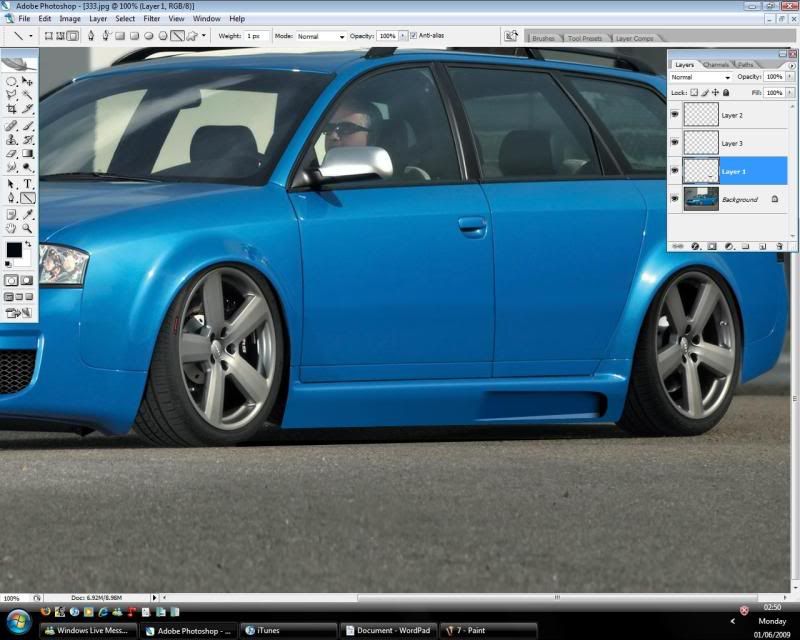
Final Result after adding shading to the bottom of the side skirt


If you require any help email me on boroboyben2007@hotmail.co.uk


Hope you find it easy to follow, email me if your stuck.
__________________
If you need any help Regarding my tutorial email me with the subject as the tutorial name followed by HELP.
boroboyben is offline   Reply With Quote
Old 06-16-2009, 08:29 AM   #2
fattack
Fizzing At The Bum-Hole
 
fattack's Avatar
 
Join Date: Oct 2005
Location: Spain
Posts: 1,618
fattack is on a distinguished road
Default

ARGH!!!! noooo!!!!!

All is well apart from step 2!!! dont lower the brightness otherwise u get this shar square edge u have above major d'ohage

instead select it like u did in ste 1 then

get your brush
black
set opacity and flow to around 40% and slowly brush until the area is dark

this allows you to have nice dark areas without the square edge!

sorry ben great tuts by the way just reading through them
__________________

fattack is offline   Reply With Quote
Old 06-16-2009, 11:02 AM   #3
PSDavinci
PSC 2000 POST MEMBER
 
PSDavinci's Avatar
 
Join Date: Sep 2006
Location: Dallas, Texas
Posts: 2,333
PSDavinci is on a distinguished road
Default

I agree with Fat totally.
Its actually wrong from a lighting standpoint anyway to have that whole area one color and then show that it gradually recesses as evidenced by the highlight.
The correct way would be to fill the initial selection shaoe with a gradient that starts with the same color as the skirt and ends in a slightly darker shade.
In order for body mods to look realistic, the first rule of thumb is to use existing colors from the car effectively!
This is Photochop 101.
You essentially broke that rule in your first colorization step, therefore your final result looks unrealistic and more like a bad cut and paste.
I think the tute has merit in the way it outlines the steps and everything else colorwise looks fine but...
Sorry bro, even tho I appreciate your effort I would not recommend this method to anyone wanting to learn to chop and obtain the best results.
__________________
http://img42.imageshack.us/img42/7698/psdchristmassig.jpg
PSDavinci is offline   Reply With Quote
Old 06-16-2009, 12:30 PM   #4
boroboyben
PSC SENIOR MEMBER
 
boroboyben's Avatar
 
Join Date: Feb 2009
Location: Peterborough England.
Posts: 356
boroboyben is on a distinguished road
Default

Well still its good for people just starting out and wanting to get to grips with starting to make their own stuff.
__________________
If you need any help Regarding my tutorial email me with the subject as the tutorial name followed by HELP.
boroboyben is offline   Reply With Quote
Old 06-16-2009, 01:19 PM   #5
PSDavinci
PSC 2000 POST MEMBER
 
PSDavinci's Avatar
 
Join Date: Sep 2006
Location: Dallas, Texas
Posts: 2,333
PSDavinci is on a distinguished road
Default

Right on bro.
__________________
http://img42.imageshack.us/img42/7698/psdchristmassig.jpg
PSDavinci is offline   Reply With Quote
Reply

Thread Tools
Display Modes

Posting Rules
You may not post new threads
You may not post replies
You may not post attachments
You may not edit your posts

BB code is On
Smilies are On
[IMG] code is On
HTML code is Off

Forum Jump


Cisco SG110 24 Port Gigabit Ethernet Switch w/ 2 x SFP SG110-24 picture

Cisco SG110 24 Port Gigabit Ethernet Switch w/ 2 x SFP SG110-24

$117.00


GENUINE CISCO 25G Base Active Optical SFP cable 3M SFP-25G-AOC3M NEW SHIPS FREE picture

GENUINE CISCO 25G Base Active Optical SFP cable 3M SFP-25G-AOC3M NEW SHIPS FREE

$65.99


Mellanox 10/25GbE SFP28 Network Card MCX512A-ACAT ConnectX-5 EN Ethernet Adapter picture

Mellanox 10/25GbE SFP28 Network Card MCX512A-ACAT ConnectX-5 EN Ethernet Adapter

$284.00


1783-SFP1GTE Allen Bradley 1G copper SFP #ZYPL picture

1783-SFP1GTE Allen Bradley 1G copper SFP #ZYPL

$679.87


F5 Networks 10GB OPT-0016-00 F5-UPG-SFP+-R 10GBASE/SR SFP Transceiver picture

F5 Networks 10GB OPT-0016-00 F5-UPG-SFP+-R 10GBASE/SR SFP Transceiver

$4.00


Genuine Cisco SFP-10G-SR V03 10GBASE-SR SFP+ Transceiver Module 10-2415-03  picture

Genuine Cisco SFP-10G-SR V03 10GBASE-SR SFP+ Transceiver Module 10-2415-03

$8.00


NEW Sealed Cisco SFP-10G-LR 10GBASE-LR SFP+ 1310nm 10km *US Shipping* picture

NEW Sealed Cisco SFP-10G-LR 10GBASE-LR SFP+ 1310nm 10km *US Shipping*

$18.00


Mellanox Original MFM1T02A-SR 10GbE 10GBASE-SR SFP+ Transceiver picture

Mellanox Original MFM1T02A-SR 10GbE 10GBASE-SR SFP+ Transceiver

$9.00


10 PCS Cisco GLC-LH-SMD 10-2625-01 1310nm SFP Transceiver Module picture

10 PCS Cisco GLC-LH-SMD 10-2625-01 1310nm SFP Transceiver Module

$85.00


Cisco 10G SFP+ Module SFP-10G-SR 10-2415-03 (Lot of 5) picture

Cisco 10G SFP+ Module SFP-10G-SR 10-2415-03 (Lot of 5)

$24.99


All times are GMT -4. The time now is 02:06 AM.


Powered by vBulletin® Version 3.8.8
Copyright ©2000 - 2024, vBulletin Solutions, Inc.
All rights reserved 2002-2008 Photoshopchop.com