Hi guys. I heard there was a need for an ImageReady Tut on here do I made one. Hope you like. The pics are saved as low quality .gifs so they'll load quickly I hope and wont suck bandwidth.
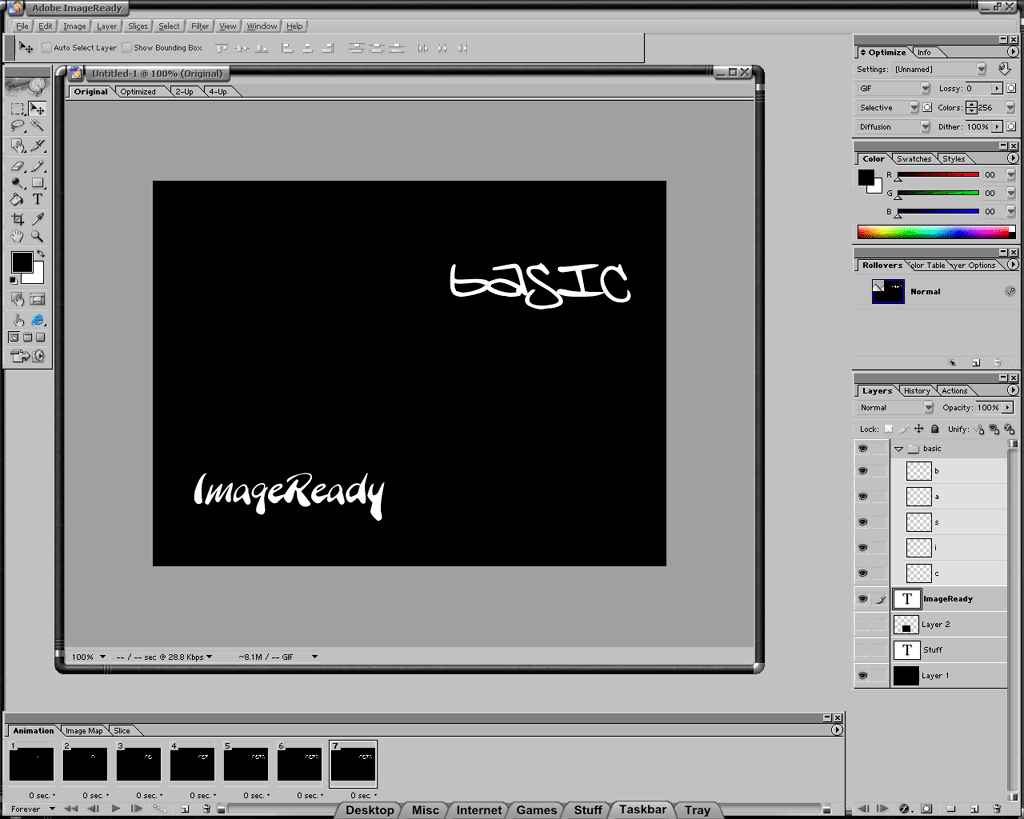
OK, so open up photoshop, and create whatever you want to make into an animation. I have these three words on here, which will all be animated. I have the word "basic" split up as you can see so each letter is on a different layer. There is a layer above the text layer "stuff" with a small black box big enough to cover the whole word. The word "ImageReady" is on the screen for now, but will be moved about when in ImageReady.

Go ahead and hit the "Switch To ImageReady" button (

) when you're finished with that.
Next, once ImageReady is opened up, hide all the other layers except for the first letter of the word "basic".

Click the "New Slide" button, and make the "a" layer visible.

Continue with this until you're done with the word. Go ahead and press play at the bottom to see what you've done. The word is animated so that it looks as if its being typed. (This is why all the letters were placed on different layers in the beginning)
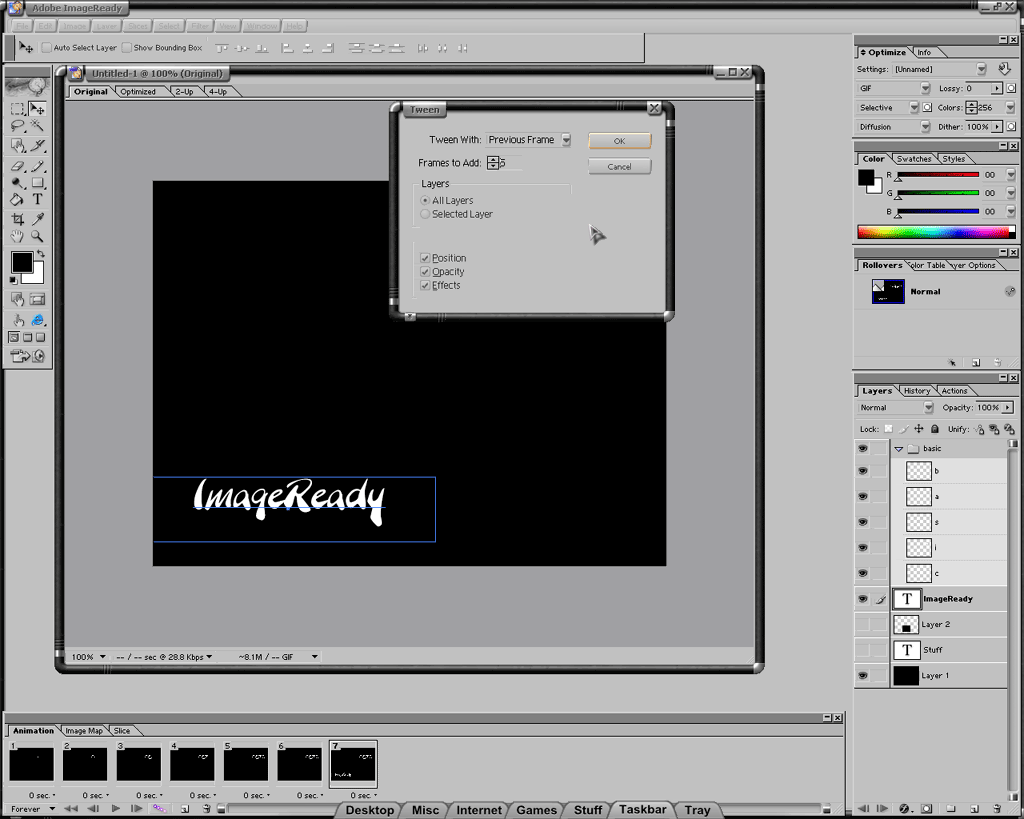
Now, take your "ImageReady" text layer and move it up above the limits of the picture until you cannot see it anymore. Make a new slide, and move the same layer down to the bottom of the picture. Like so,
Now click the "Tween" button (

). Make sure it says "Previous Frame" if you have the last slide selected, and you can adjust the number of frames to any amount you want. The more frames, the slower the text moves, but the less frames, the choppier it moves. You can fix this a bit using delays, but that's just a general rule to remember.
After that, you can repeat the process with the black box over top of the word "Stuff". Simply Make both layers visible on a new slide, with the black box covering all teh text. Make a new slide, and move the box in any direction, then repeat the steps for tweening.
Once through with the creation part, try adjusting the delays a bit. Each slide has its own time to stay on screen, and its usually set to 0.1 sec default. You can have it linger for 5 seconds before moving to the next slide by simply clicking the drop down menu right under the thumbnail in the bar at the bottom of the screen. Mess around with those until you get a nice timing for your animation.
After you have finished, I reccomend you save the .psd for future references, as well as saving a .gif. Saving a .gif to show on the web is the same procedure as saving a photo, but instead of using "Save for Web" you use "Save Optimized As..." under the file menu.
ImageReady is a very simple program to learn, and allows you to become very creative with your work. What seems as a fancy effect can be easily recreated in ImageReady if you put your mind to it. Again, this is only a basic tutorial and won't guide you through the more advanced stuff.
Hope this helped

I'm sorry I can't show you the finished animation, ImageReady was freaking out on me and wouldn't let me access the file menu. Oh well, ou shouldn't have a problem replicating this animation.


 [/CENTER]


 Linear Mode


