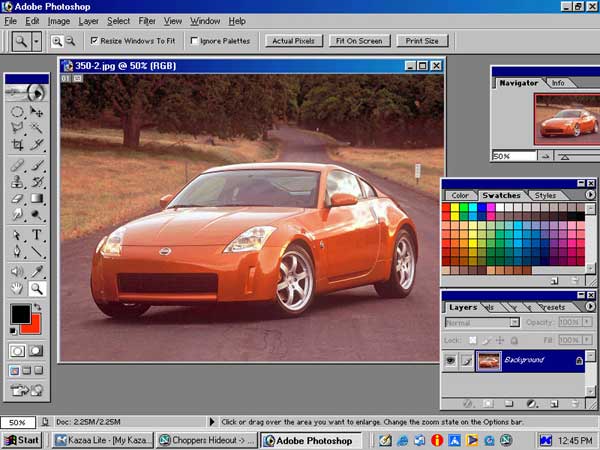
STEP #1
We will start with this Nissan 350Z:
|
|
|
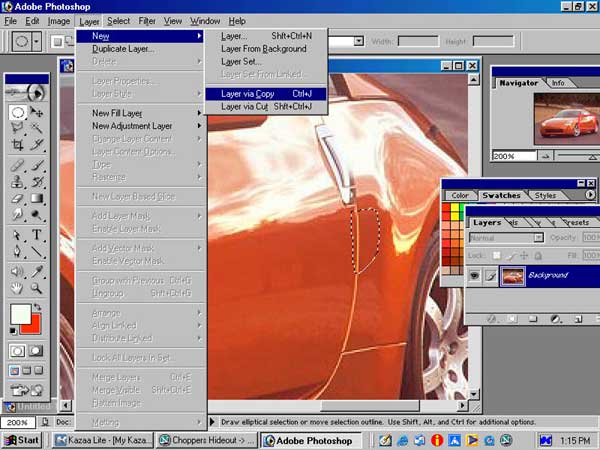
STEP #2
Next, select the area you want to be a vent, and make it a new layer. Make sure that is in perspective with the car or it wont look good!
|
 |
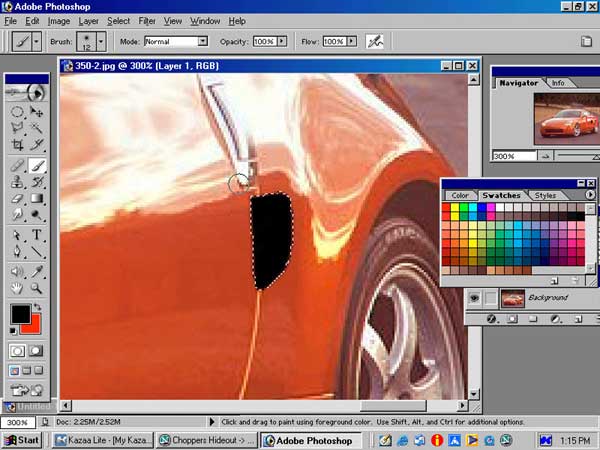
STEP #3
Now select that layer and take your paintbrush and paint the whole selection black
|
 |
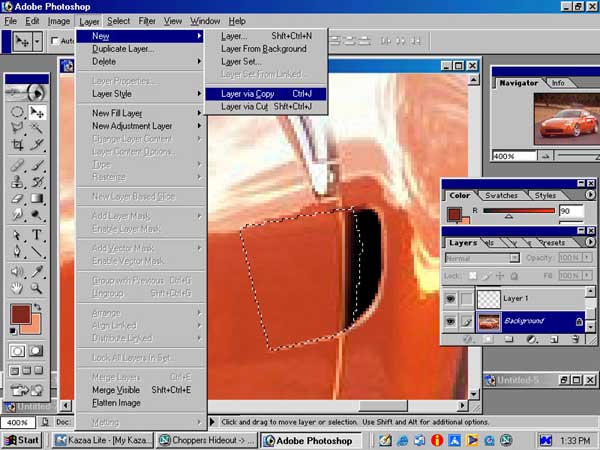
STEP #4
Now with the vent layer still selected take out the polygon lasso tool and hold down Alt so you can deselct some of the vent. We do this because we will paint here and give the vent a 3d look. leave just a little room to paint in, dont make it too thick or it wont look real. Also on the bottom, you will want to add to the selection a little (look at the pic and you will see what im talking about) now make sure you click on the backround layer and then make a layer. now drag that layer above the vent layer.
|
 |
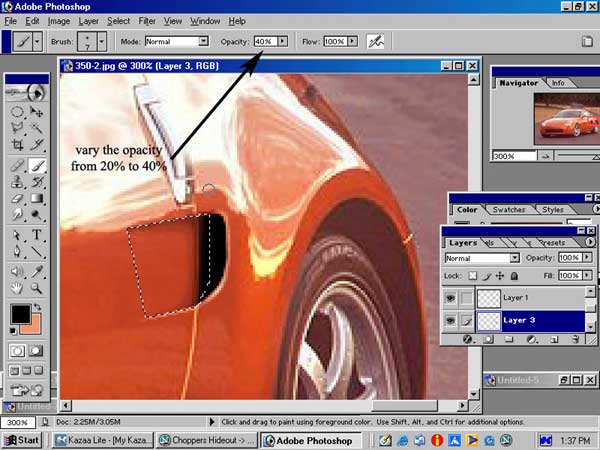
STEP #5
okay now heres the tough part, the actual painting. Select the layer you just created, and grab your airbrush tool. Now in order to paint this section and make it look 3d, you will have to select colors that are lighter than where your vent is, and you can find those colors all over the car. you will also need to make a small glare at the bottom of the slection, use the brightest color that you can find on the car for this. at the top of the selection you will want to paint it a darker color . After you finish, add some noise to it, use around 2%-4%
Note for this step: on a real car, as you get further away from the glare, the colors gradually become darker so you will need to do this when airbrushin this part
|
 |
STEP #6
Now switch to the actual vent layer and get out a SOFT edged eraser, erase any parts that you feel u dont need.
|
 |
STEP #7
Now switch to the backround layer and make a selection similar to this, but you can make it as big or small as you want. The longer that you make it, it will look more realistic. We are doing this to make a shadow for the vent. make a new layer with this selection
|
 |
STEP #8
Next load the layer you just created get out your airbrush tool and select the color to be black. now you will want to lower the opaccity, so it looks like a shadow. make it get lighter as you move further from the vent
|
 |
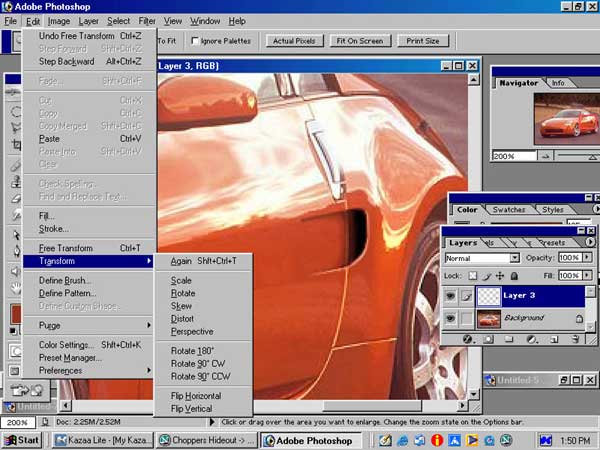
STEP #9
Now merge those 3 layers into one. Make any nessecary adjustments with the size and shape by transforming..
|
 |
STEP #10
You will end up with something like this.
|
 |
|
|


