|
STEP #1
First we take a black car. It is preferable to use a black car because the end results will be much better when completed. |
|

|
|
STEP #2
Use the polygon lasso tool and outline the places that you want to appear as chrome.
|
|

|
|
STEP #3
Duplicate your original layer so you now have two copies of your original pic.
|
|

|
|
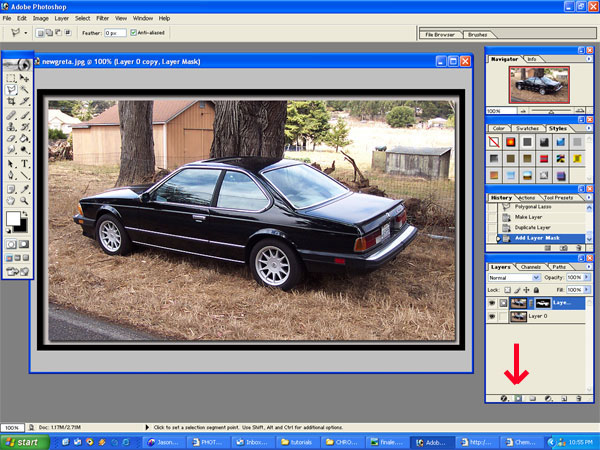
STEP #4
Now you will need to mask the new copy you made. If you don't know how to mask it is the small square with the circle in it on the bottom of your tool bar. I have pointed an arrow to it for easier use.
|
|
|
|
STEP #5
Now you will need to select the mask. It will appear as a white image on a black field. Then use the blending options drop down menu and choose screen.
|
|

|
STEP #6
Your image should look something similar to this. Its almost done.
|
|

|
|
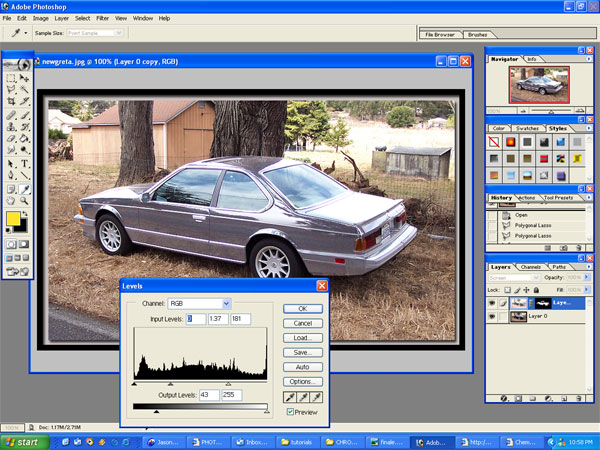
STEP #7
Before you do anything make sure you have the unmasked section of the copied layer selected as shown below. Now you will need to click on the top tool bar and choose the image option and then select Adjustments, followed by Levels.
|
|

|
|
STEP #8
Each and every time you adjust your levels it will be different. Just play around until you can get the desired effect. Its really not that difficult.
|
|
|
|
STEP #9
Your final project should look something like this.
|
|

|
 | | |


